Quick Start Guide
This walkthrough will use the local recording option to get you up to speed quickly.
Teams
- Tap the Teams Tab.
- Select Hockey.
- Tap Add Team.
- Enter the team name and optionally, the abbreviation.
- Select your team logo from your Photos.
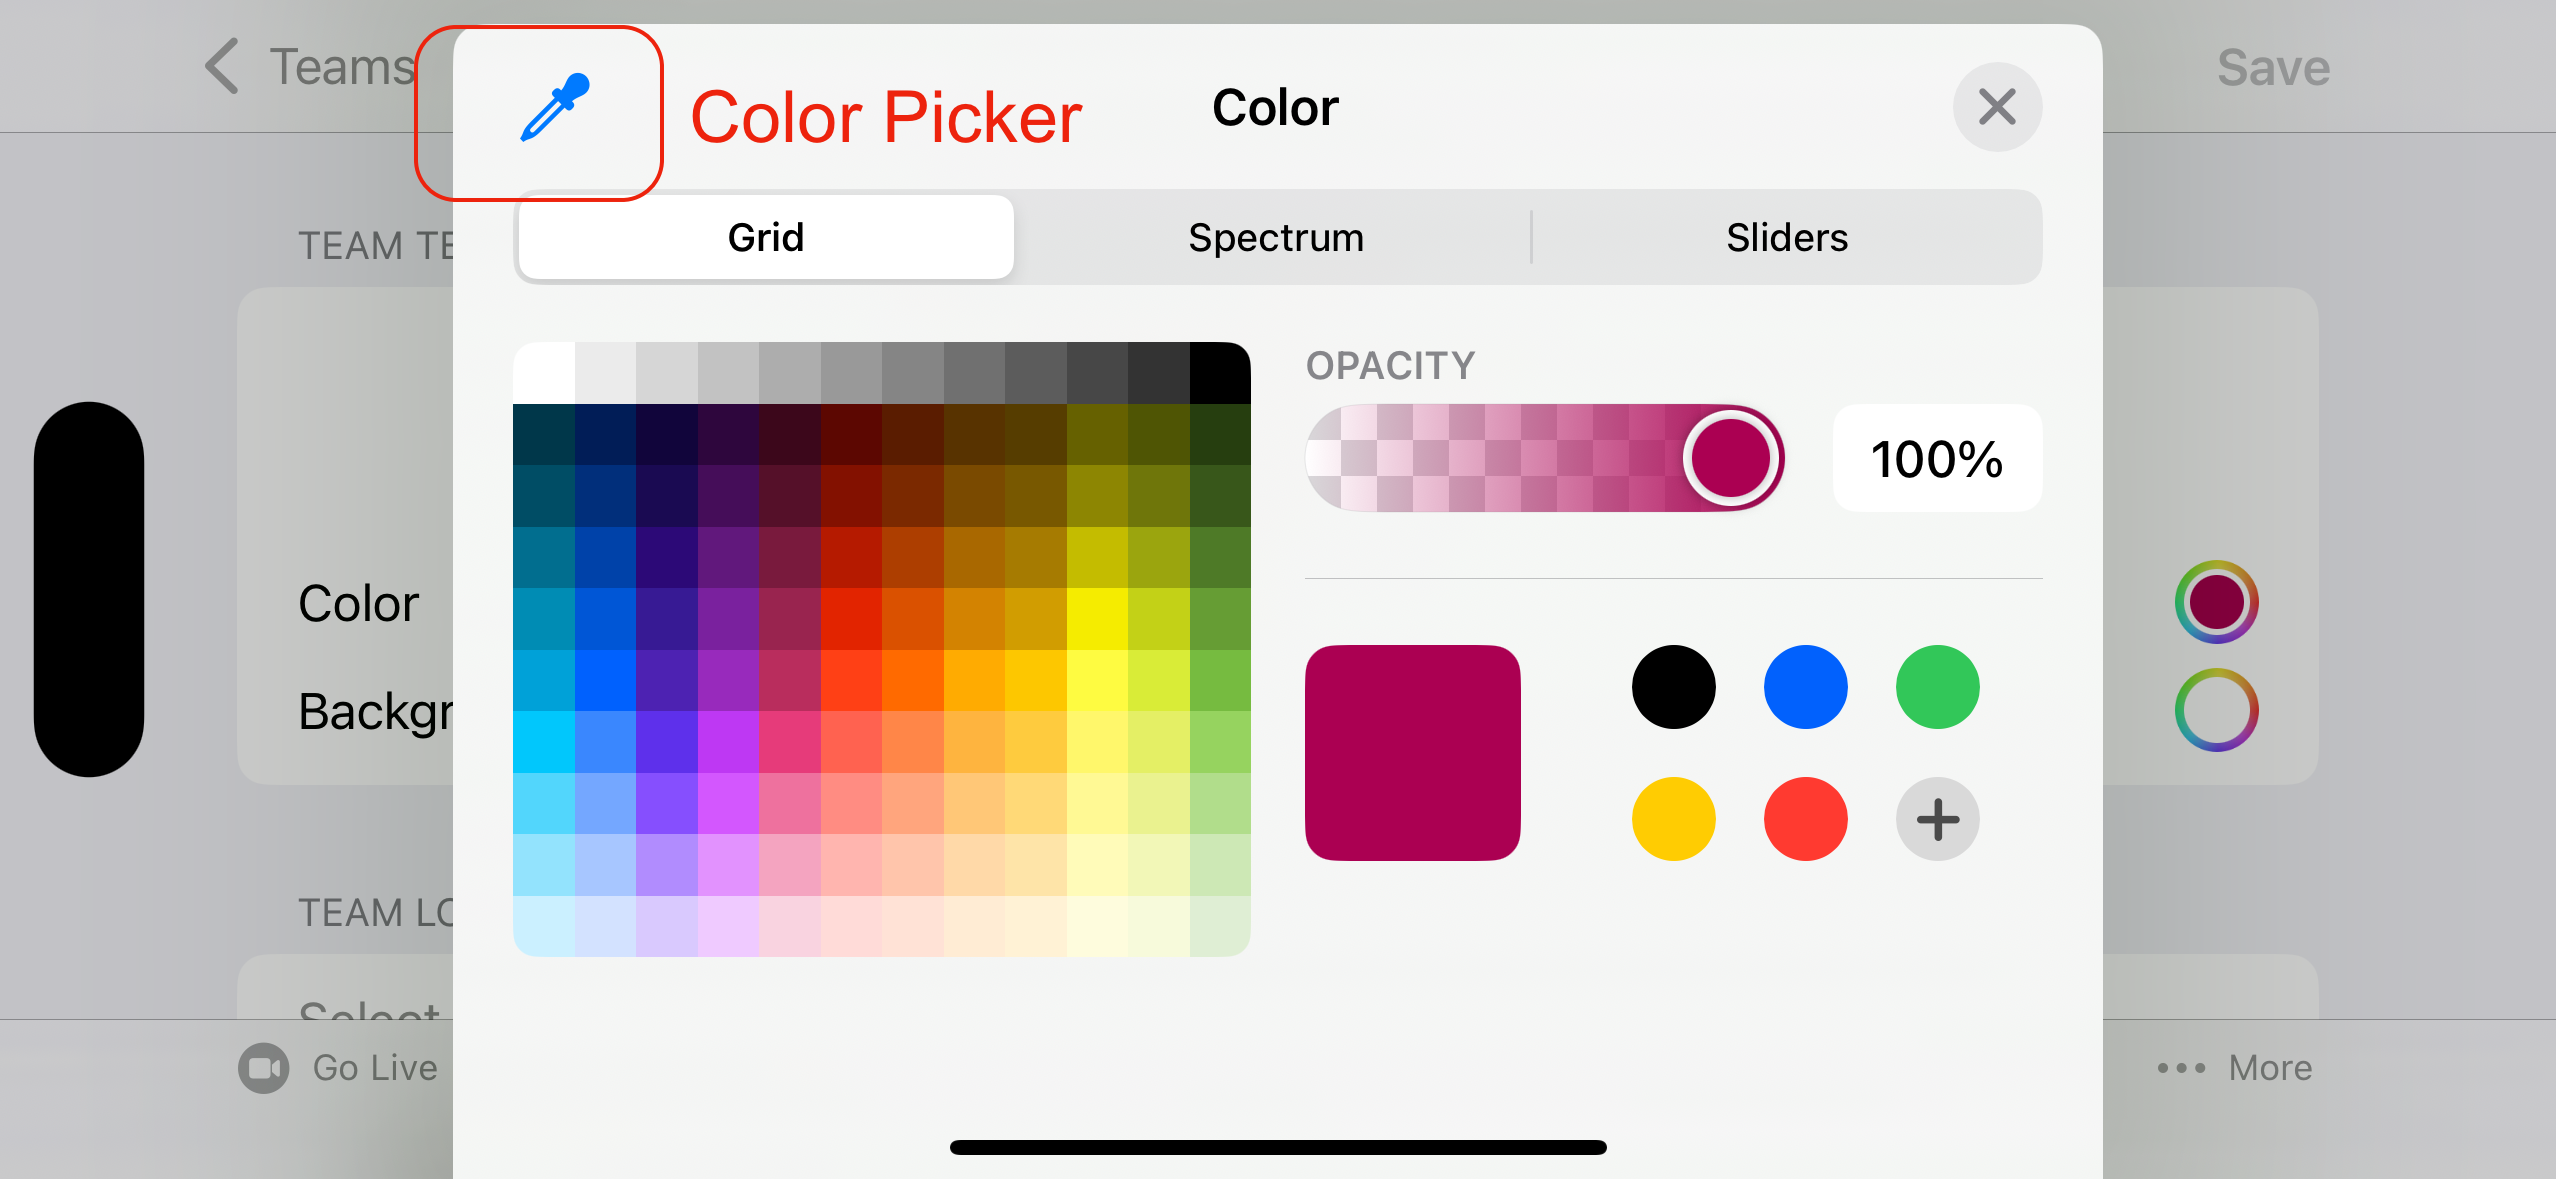
- Select your team colors. Use the color picker to sample directly from the
logo: drag the loupe over the color you want, release to capture it, then
close the picker.
- Tap Save.
- Add the other team.
Go Live
- Tap the Go Live Tab.
- Select Record Locally Only.
- Tap Next.
- Select Hockey.
- Tap Next.
- Select the home team.
- Select the away team.
- Tap Next.
- Tap Next (skip using a Remote Control or Camera).
- In the Hockey Scorebug section, toggle Show Clock on.
- Toggle Show Shots on Goal on.
- Toggle Show Scorebug Immediately on.
- Leave Advantage Mode set to Manual.
- In the Muted Overlay section, select Large Centered.
- In the Video Settings section, select 30 fps.
- Select 720p.
- Tap Start Recording.
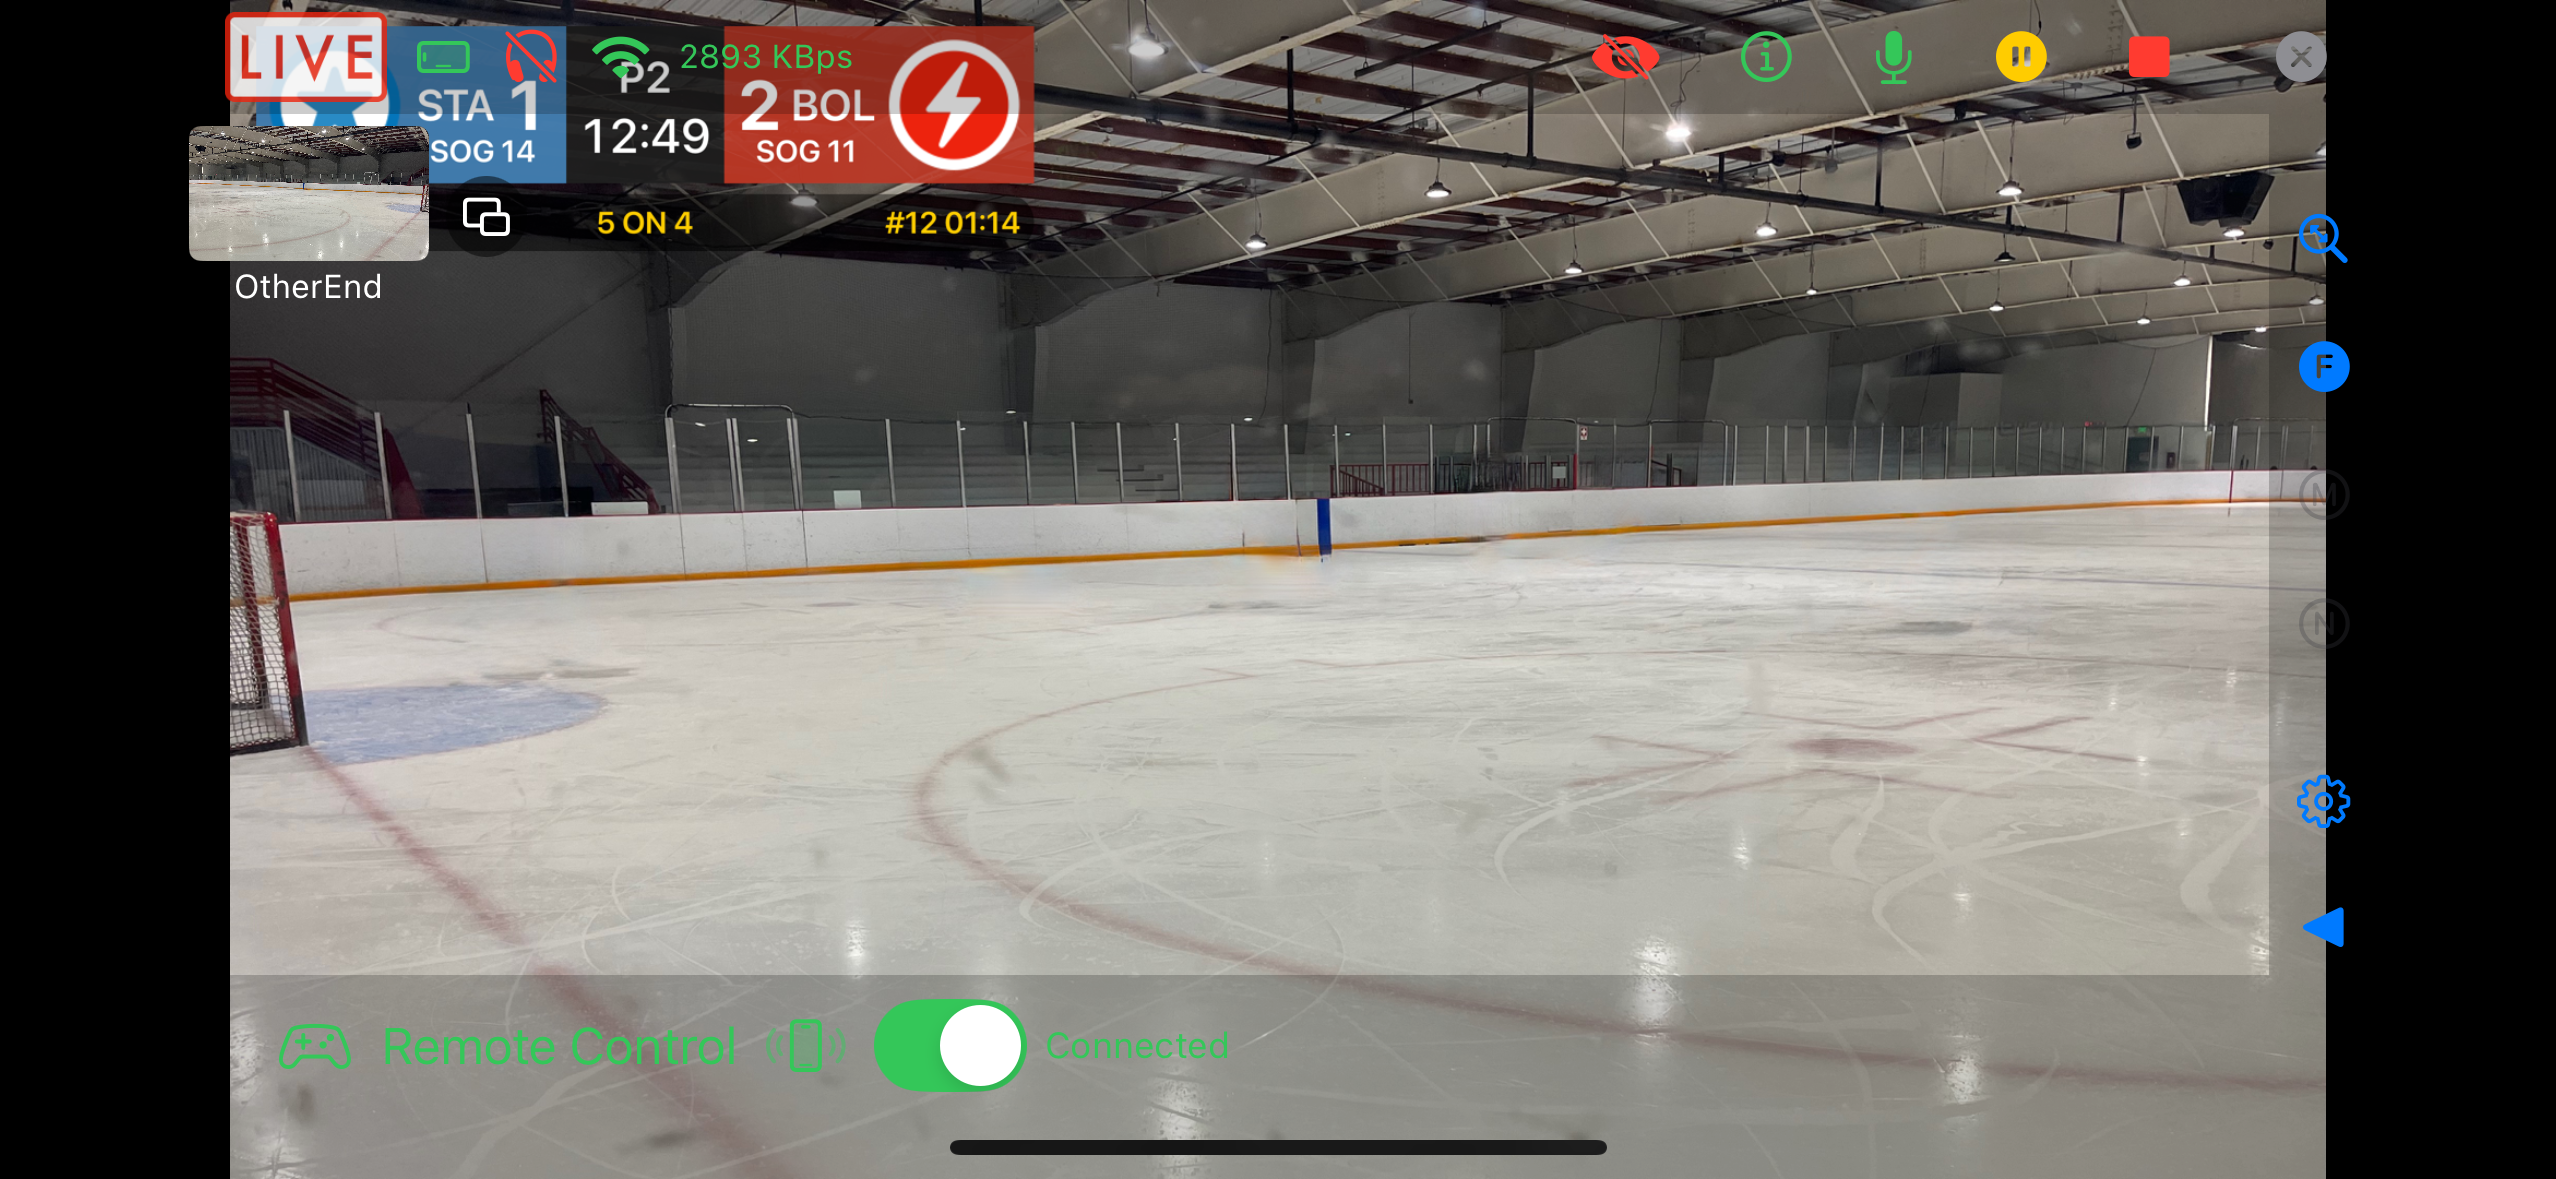
Broadcaster Camera View

- The Camera View status indicator in the top left corner shows Off–Air.
- At the top of the screen, the Control Bar shows the status of the stream on the left and has the recording controls on the right.
- On the right side are the Zoom controls.
- Along the bottom of the screen are the buttons for four control panels.
- Make sure you are in landscape mode; the orientation indicator (next to the status) should be landscape and green.
- We recommend using either a wired or Bluetooth headset for commentary. When a headset is connected, the headphones indicator will be green.
- The recording indicator is currently gray indicating no activity.
- Tap the info icon to view details of the current session.
- Dismiss the info dialog by tapping the unfilled dialog close button below the filled Camera View close button.
- Use the microphone icon to mute/unmute audio.
- Tap the Play/Pause icon to show the intermission screen and start the recording. The status is now Standby, the recording indicator should now be green, and the microphone is muted.
- Tap the Play button to show the Camera View and unmute the audio. The status is now Live.
Controlling the Scorebug
- Tap the Scoreboard icon.
- Add a score for the home team.
- Add a shot on goal for the home team.
- Dismiss the scoreboard dialog.
- Check the updated score and shot count.
- Tap the Clock icon.
- Tap the 15m preset, then tap Update Clock to set the clock to 15:00.
- Dismiss the clock dialog and check the updated clock.
- Tap the Clock icon.
- Tap Start Clock to start the clock.
- Dismiss the clock dialog and check the running clock.
Showing Messages
- Tap the Events icon.
- Select the Away team.
- Tap Minor Penalty.
Intermissions
- Tap the Pause icon.
- The intermission screen appears and the microphone is muted.
- Tap the Play icon to return the live camera feed.
Ending the Stream
- Tap the Pause icon.
- Tap the Scoreboard icon.
- Toggle Game Over on.
- Dismiss the scoreboard dialog.
- Wait a few seconds, then tap the Stop icon.
- Tap the Camera View close button (filled) to close the Camera View and return to the Go Live tab.
Review the Recording
- Tap the …More tab.
- Tap Saved Recordings.
- You will see your recording in the list.
- Slide the recording to the left to reveal the Save to Photos and Delete actions.
- Tap Save to Photos.
- Tap OK when the save is completed.
- The recording is now in Photos and can be shared or uploaded from there.
Streaming
We recommend setting up a YouTube Endpoint and streaming with scheduled broadcasts.
Using a YouTube Account directly is easier, but the stream will always be on your account’s channel.